The House that George and Mary Built
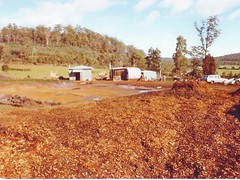
Building site viewed from the South. In the background you can see the Hill that is called Mount Direction. It's the Highest point between George town and Launceston.
During the early days of colonisation Mount Direction was where a semaphore station relayed messages to the port of Launceston the arrival of ships coming up the Tarmar River.
The buildings from left to right in are Workshop, caravan and storage shed. We lived in the caravan for the time we were constructing the house.
The road that borders the west of the property, (see Satellite photo from part two) when Tasmania was still a colony, (currently the Old Bangor Tram Road )was a narrow gauge tram track that was used to transport slate from the mine that was about 10 Km north of our building site. The line ran down to a jetty on the Tamar River where it was loaded on ships or barges to be split into shingles for roofs in Launceston Town.
The mine was abandoned around 1938 or so as most of the larger chunks of slate were depleted. There was one fella working the smaller bits and spitting for floor tiles etc. We did take advantage of the good price of the slate tiles and used them to tile out the bathroom floor and walls.
Having worked at the wood-chip mill left me with connections and I was able to have about 150 tones of spoiled wood-chips brought to the property to use as ground cover where the excavation work had been done on the site to keep the dust down.
The timber for construction of the house was harvested from a local forest and milled nearby. The mill was a little 2 man operation and I was able to get all the timber I needed from them. At the time the price of green cut timber was $22 per 100 super feet. A super foot is measured as a board 12 in. long 12 in. wide and 1 in. thick. 100 board feet equals 150 ft. of 4x2, 100 ft. of 6x2 etc. etc.
The framework for the house was made up of 4x2, 6x2 and 10x2 The floors were of 1x3 in. kiln dried hardwood seconds. The whole house was hardwood floors for under $700. I was able to get blackwood wall panels that were remodelling from a remoulding of a kitchen manufacturer sales room. That was used to panel out the bedroom and to make kitchen cabinets and benches. The remainder of the house was panelled in ½ x 8 in. planed air dried fence palings ½ x 6 or 8 in. used here to build fences.
In the process of building the house we did all we could to recycle whatever we could. I consider that as as a very green house.
The windows were all double glazed and the walls were insulated.
The temperature inside was 10 degrees C different than outside: cooler in the summer and warmer in the winter.
The links below will take you to a few more photos of the house and then it will end my little Photo Essay.
Mary and a friend of ours washing up after the meal. Behind Mary is the walk-in pantry. The sink Ray is wiping down I made from an old copper hot water cylinder.
That's me preparing a meal. The gas stove top was on casters under the work bench and was pulled out to cook On the right of the bench you can see the smokestack from the combustion stove. That stove had a hot water manifold in it and the feed to the electric hot water cylinder ran through it. That was a booster for preheating water when it was cold and used less power to heat.
Our dinning table built in and constructed from Tas oak. Note the post on the left was a wattle tree growing on the property. On the right is the stairwell to the bedroom.
Mary in the bedroom. The blackwood panels were recycled from a remodelling job to a kitchen manufacturing showroom.
Landscaping at the back (east side) of the house Using the woodchips.
Mary's oven out the back of the caravan. She baked in it for 3 years until she had the idea to use an electric fry pan as an oven. It worked very well.
Here we are sitting at the table hamming it up for the camera. Behind us you can see part of the Blackwood cupboards.
Mary with Baccus the cat sitting in a blackwood chair I built for the house furnishings. You can see the gas top put away under the work bench behind her.
Front entryway with the roof covering it.
entry way a view from the west. Used recycled fertiliser bags to cover cladding to keep out the rain until the shingles could be put on.
The Shingles are in place. They have been cut from Asbestos sheeting to cover about 400 sq m. ( didn't know then what we know about asbestos now). The flashing was made from 6 mm thick perspex from salvaged illuminated sign faces.
Construction of outer forms were designed to angle of the slope of the pyramid.
Tasmanian Oak cut for Fence Paling's was to construct forms. It was inexpensive and strong enough to hold the concrete with out bucking.
Outer corner forms set into place and used to check to see that the base was square.
Outer forms set in place West side. The outer footings were to support the roof beams.
Inner footings that were to carry the baring load of the house. They were put into -place after the outer footings were pored.
Viewing the forms from the north west corner. When laying out the level for the footings I did not have a theodolite, (a builders level)so I used the same method the Egyptians used. No quite in the exact way they did. Instead of flooding the site and draining the water away until they were at the desired hight and able to mark the level at the surface of the pond. I used a hose Wired to a stake at he highest level and filled it with water and adjusted hight of the lower point until I had the correct level for the surface of the footings.
There was approximately 25 Cu M of concrete in the footings. At the time we were building concrete was at around $100 a Cu M. That would have put the cost of concrete alone at about $2,500. Well, I bought a Cement mixer for $350 and the cement and aggregate for about $850 and did the job for about $1,100.
The north west corner ready to pore. Each corner was completely pored in one go. it took 2 of us about 7 hours to mix and pore so that we did not get a dry join of the concrete.
Look closely and you can see that the outer footings were designed with a notch built into them so when the inner footings were pored there was firm support to carry the bearing load of the house equally.
The footings completed and ready to start setting up the framework of the house.
Frame work in place, ready to rise into an upright position. The timber used in construction of the house was green cut Tasman Oak. By green I mean un-cured timber. Tasman Oak is the local species of hardwood from eucalyptus trees and only found in old growth forest in Tasmania. When this timber is cured you can not drive nails into it with out drilling a hole just under the size of the nail Or to use a nail gun. As I remember at the time there was no nail guns around so I did it the hard way.
A view of the south east conner of the house with frame work in place. Green timber is very heavy as it contains about 30% water so to raise the framework into place I used what's called a Jack pole. That was P pole about 4 m long with one end in a shallow hole so it cant move out from under the lode and fall over. A rope was tied to the top end of the pole and what's called a come along attached from the top of the pole to the frame work and pulled upright with a mechanical advantage.
When the ground level framework was up and the floor and celling joist in place The roof joist were added and the structure was locked into place and nothing could shake the framework.
With the framework up the stairwell to the next level went in.
As the ground level was open plan where I needed support for the celling/floor beams I used three logs cut from the property
Viewed from the south side shows the framing for the sun room.
From the west showing the front entry way.
View from inside to the sun room.
http://www.flickr.com/photos/38786513@N02/3567302305
Distant view of south west conner showing the second level frame work and roof cladding going up. The cladding was 20 mm thick hardwood.
Closer view of cladding from the north west corner.
All up the Land, house and all the tools needed to build it came in under $30,000.
I have babbled on long enough about the house. I hope you enjoyed my story and if you have any questions please feel free to send me an e-mail at:
reawaraent@yahoo.com
George
No comments:
Post a Comment